The Ancient Trade Route Borasu Pass Trek
Long before it became a trekker’s delight, Borasu Pass was a functional trade artery. For centuries, the villagers of Osla and Gangaad (in Uttarakhand) used this pass to trade with the people of Chitkul and Sangla (in Himachal).
- The Goods: Traders carried wool, salt, and local grains.
- The Kinship: To this day, many families in the Mori/Sankri block have distant relatives or ancestral ties in the Kinnaur region, all thanks to this high mountain pass.
The Mythological Connection
According to the local folklore shared by the guides of the region, the pass lies in the shadow of the Swargarohini Massif. Himalayan Hikers often emphasize the legend that this valley is the "Pathway to Heaven." Local lore suggests that the Gandharvas (celestial musicians) reside in the meadows near the Borasu Glacier, and the pass itself is a gateway guarded by the mountain spirits.
Geographical Significance: The Great Divide
Borasu Pass (5,450m) acts as a literal wall between:
- The Garhwal Himalayas:Supin River.
- The Kinnaur Himalayas: Known for their stark, arid beauty, vertical granite cliffs, and the serene Baspa River.
The pass is located remarkably close to the Indo-China Border. While standing at the summit, the peaks you see to the North belong to the Tibetan plateau, making it a strategically sensitive and breathtakingly beautiful location.
The Glacial Moraine & The "Ice-Wall"
One of the highlights of this trek is navigating the Borasu Glacier. Depending on the season, the approach to the pass involves:
- Spring (May/June): Negotiating deep snow slopes where the incline can reach nearly
- Autumn (Sept/Oct): Navigating through hard ice and crevasses, often requiring the use of fixed ropes—a specialty of the Himalayan Hikers' technical team.
The Har Ki Dun Connection
The trek starts in the Har Ki Dun valley, often called the "Valley of Gods." While most tourists end their journey at the Har Ki Dun campsite, Borasu Pass explorers push further into the wilderness.
The pass sits on the ridge that divides the watershed of the Yamuna (via the Tons River) and the Satluj (via the Baspa river). To the north of the pass lies the Tibet border, and the views from the top include the majestic Swargarohini massifs and the Bandarpunch range.
The Cultural Transition
The trek is a living museum. You start in Sankri/Osla, where the architecture is defined by multi-storied wooden houses and the worship of Someshwar Mahadev. By the time you cross the pass and descend into Chitkul, the architecture shifts to Kinnauri styles, and the culture blends Hinduism with Tibetan Buddhism.
Summary of the Borasu Spirit
Trekking Borasu Pass is like reading a history book written in stone and ice. It is a bridge between two worlds. It challenges your body, but the sight of the Bandarpunch and Kinner Kailash ranges from the top makes every drop of sweat worth it.
Borasu Pass Trek Complete Guide
Our mission has always been to ensure that no trekker steps into the Himalayas without the right perspective. A trek is not just a checklist of summits; it is a serious commitment to the outdoors. Having the right information is what separates a reckless climb from a soulful journey.
This section serves as your definitive manual for the Borasu Pass Trek. We have distilled years of mountain experience and real-time feedback into this guide to give you a clear, honest picture of the trail.
We provide this depth of information because we want you to be more than just a visitor—we want you to be a prepared, responsible trekker who respects the mountains as much as we do.
Day 1: Drive from Dehradun to Sankri (The Gateway) of Borasu Pass Trek
Altitude: 1950 m
Distance: 190 km -8/9 Hours
The journey begins from Dehradun, passing through the scenic Mussoorie hills and the Yamuna bridge. You enter the Govind Wildlife Sanctuary at Netwar and reach Sankri, the headquarters for Himalayan Hikers. Meet our team members or branch office at Sankri
Day 2: Derive from Sankri to Gangad Village – Same day Trek to Cheludgad /Seema Camp
Altitude: 2560 m
Drive: 25 km 2/3 Hours - Trek: 05 KM Gangad to Cheludgad Camp
A short, bumpy drive to Gangad Via Taluka marks the start. You trek through a dense forest of blue pine and cedar. You’ll cross the Supin River and pass the historic village of Dhatmir, Gangad Osla before reaching the Seema campsite.
Day 3: Trek Seema/Cheludgad to Har Ki Dun Camp
Altitude: 3,566 m
Trek: 12 KM -(7-8 hours)
The trail climbs steadily. As you ascend, the "Cradle-shaped" valley opens up. You are greeted by the massive Swargarohini peaks. This is one of the most beautiful campsites in the Himalayas.
Day 4: Acclimatization Day at Har Ki Dun (The Himalayan Hikers Special)
Purpose: Active Recovery & Altitude Adjustment.
Activity: A short hike to Maninda Tal or towards Jaundhar Glacier.
This day is vital. By staying an extra night at 3,500 m your red blood cell count increases, significantly reducing the risk of AMS (Acute Mountain Sickness) for the 5,000 m+ push ahead.
Day 5: Trek from Har Ki Dun to Ratta Tho
Altitude: 4,100 m
Trek: 07 KM (4–5 hours)
The terrain shifts from meadows to moraine. You leave the tree line behind. Ratta Tho (Red Stone) is a high-altitude grazing ground for Himalayan Ibex and Blue Sheep.
Day 6: Trek from Ratta Tho to Upper Lamjunga (Base Camp)
Altitude: 4,850 m
Trek: 06 KM (5 -6 hours)
Day 7: Trek from Upper Lamjunga to Bonga Camp via Borasu Pass
Altitude: 5,450 m (Pass) | 4,400 m Camp
Trek: 11 km - (9–11 hours)
The Summit Push: You start at 3:00 AM. Using micro-spikes/crampons, you navigate the snow slopes and the technical "Ice Wall" near the pass. From the top, you see the vast expanse of the Kinnaur ranges.
The Descent: A sharp, technical drop into the Baspa Valley (Himachal side) leads you to the green pastures of Bonga.
Day 8: Trek from Bonga to Chitkul Road Head overnight stay Hotel
Altitude: 3,450 m
Trek: 15 km (7–8 hours)
A scenic walk through the Rani Kanda meadows. You’ll cross several streams and eventually reach Chitkul, the last village on the Indo-Tibetan border. Enjoy the "Last Indian Dhaba" experience!
Day 9: Drive from Chitkul to Shimla (Departure)
Distance: 240 km (9–10 hours’ drive)
The expedition ends with a drive through the famous Kinnaur roads (hanging cliffs) alongside the Satluj River, reaching Shimla by evening.
Day 1
Day 2
Day 3
Day 4
Day 5
Day 6
Day 7
Day 8
Day 9
Day 1: Pick up from Dehradun & drive to Sankri
Pickup: 6:00–6:30 AM Drive: -200 km (Approx: 8–9 hrs) | Altitude: 6,400 ft
The journey begins before sunrise in Railway Station, Dehradun, when the city is still half-asleep, and the air carries a quiet freshness. As a trekker, there’s a mix of excitement and curiosity you’re about to leave behind the familiar and step into the mountains.
By 6:00 AM, you meet your group, backpacks loaded and spirits high. The vehicle pulls away, and slowly the urban landscape fades, replaced by winding roads and rising hills. As you climb toward Mussoorie, the first glimpses of the Himalayas appear through the morning mist, distant, calm, and inviting.
The road narrows as you move deeper into the mountains. Pine forests begin to dominate the landscape, and the scent of deodar fills the air each time you step out for a quick break. The drive follows the beautiful Tons River for long stretches, its turquoise waters rushing alongside like a constant companion.
Villages pass by small, scattered, and untouched by the rush of city life. You watch locals going about their day, children waving at passing vehicles, and farmers working on terraced fields carved into steep slopes. Time feels slower here, almost intentional.
Hours later, as the sun begins to soften, you finally arrive at Sankri, a quiet mountain village surrounded by towering peaks and dense forests. This is where the road ends and your trekking story truly begins. As you step out, the crisp mountain air hits differently, cool, clean, and full of promise. The evening is calm, with trekkers sharing stories, guides giving briefings, and the distant outline of snow-capped peaks visible against the fading sky.
Day 2: Drive from Sankri to Gangad Village and Same day Trek to Cheludgad /Seema Camp
Drive: 25 km (Approx: 2-3 hrs) | Trek: 12–14 km (Approx: 6–7 hrs) | Altitude: (Gangad Village: 7,500-8,200 ft | Cheludgad /Seema Camp: 8,400 ft)
The morning in Sankri begins quietly, with a soft chill in the air and the distant sound of the Tons River echoing through the valley. As a trekker, you wake up knowing this is the day the real journey starts. After a warm breakfast and a final gear check, you hop into a rugged vehicle for the short but bumpy drive toward Gangad village.
The road winds through dense forests and narrow mountain bends, each turn revealing deeper layers of the Himalayas. Small wooden houses appear scattered along the slopes, and life feels slower, simpler. By the time you reach Gangad, the motorable road ends and your trek truly begins.
With your backpack secured and boots laced tight, you step onto the trail. The path follows the roaring Supin River, sometimes close enough to feel its spray, sometimes high above it on rocky ledges. The rhythm of walking slowly takes over breath, step, breath, step. Pine and deodar forests surround you, their scent fresh and grounding.
As you pass through tiny hamlets, you might exchange smiles with locals or see children playing along the trail. There’s a sense of entering a world far removed from city life. The climb is steady but not overwhelming, giving your body time to adjust while your mind absorbs the raw beauty around you.
Hours pass almost unnoticed until the landscape begins to open. You arrive at your campsite, either Cheludgad or near Seema, just as the light softens into golden hues. The river hums nearby, and towering peaks stand silently in the distance.
Boots come off, tents are pitched, and a warm meal feels incredibly rewarding after the day’s effort. Sitting under the vast Himalayan sky, you realise this is just the beginning—your body slightly tired, but your spirit fully awake.
Day 3: Trek from Cheludgad /Seema Camp to Har Ki Dun
Trek: 10–12 km (Approx: 6–7 hrs) | Altitude: 11,700 ft
Morning arrives gently at Cheludgad / Seema, with the soft glow of sunlight filtering through the mountains and the steady sound of the river flowing nearby. As a trekker, you step out of your tent into crisp, cold air, your body slightly sore from yesterday, but your mind ready for what lies ahead.
After a warm breakfast, you shoulder your backpack and begin the day’s journey toward Har Ki Dun Valley. The trail starts gently, weaving through pine and deodar forests, where sunlight dances between tall trees and the earthy scent of the forest keeps you grounded.
As you move forward, the path gradually opens. Wooden bridges appear over glacial streams, and every crossing feels like stepping deeper into untouched wilderness. You pass ancient Himalayan villages, where traditional wooden houses stand strong against time, and life moves in harmony with nature.
The climb becomes more noticeable, but it never feels overwhelming. Your pace is steady, calm, almost meditative. With every turn, the valley reveals more of itself. Snow-capped peaks begin to emerge in the distance, standing tall and silent, as if watching over your journey.
By midday, the landscape transforms completely. Dense forests give way to wide alpine meadows, and suddenly, you’re walking into the vast openness of Har Ki Dun. The valley stretches out like a hidden world—lush, green, and surrounded by towering Himalayan peaks.
When you finally reach the campsite, there’s a quiet sense of achievement. You drop your backpack, take a deep breath, and simply stand still for a moment. The beauty around you doesn’t feel real, it feels earned. As evening falls, the sky turns shades of orange and purple, and the peaks glow in the last light of the day. Sitting there, wrapped in warm with a cup of tea in hand, you realise this isn’t just a trek, it’s an experience that slowly unfolds, step by step.
Day 4: Acclimatisation Day at Har Ki Dun (The Himalayan Hikers Special)
Activity: Short hikes & rest | Altitude: 11,700 ft
The morning at Har Ki Dun Valley begins slowly, wrapped in a deep Himalayan calm. The peaks around you are already glowing in soft sunlight, while the valley still holds the last traces of cold night air. As a trekker, you don’t rush today. There is nowhere higher to go for now. Today is about adjusting, breathing, and letting the mountains settle into your body.
After a relaxed breakfast, you step outside your tent without the usual pressure of packing or moving ahead. The purpose of the day is simple: acclimatise. The air is thinner here, and your body needs time to adapt to the altitude. So instead of pushing forward, you slow down and let the mountains set the pace.
You take a short hike around the valley with your group. The trail is gentle, winding through open meadows and glacial streams. Every step feels light, almost playful. Snow-clad peaks like Swarga Rohini stand tall in the distance, watching quietly as you explore their base.
There’s a different kind of awareness today.
You notice small details: the sound of water flowing over stones, the way clouds drift over ridges, the crunch of frost beneath your shoes. It’s not about distance anymore; it’s about presence.
Your guide reminds you to walk slowly, drink water often, and listen to your body. This is how the mountains teach respect, not through difficulty, but through patience. You sit for a while on a grassy slope, letting your breath settle and your mind quiet down.
As the day moves on, small acclimatisation hikes continue. Nothing strenuous, just enough to keep the body active and responsive. You feel you’re breathing gradually becoming steadier, your steps more comfortable at this height.
By afternoon, you return to camp. The valley feels even more peaceful now, as if it has fully accepted your presence. Tents stand quietly under the vast sky, and the river flows endlessly beside you.
Evening brings a golden glow over the mountains. You sit outside, sipping something warm, watching shadows stretch across the valley. There is no urgency, no climb waiting for tomorrow, just stillness. And in that stillness, you realise something simple: acclimatisation isn’t just for the body. It’s the moment you start adjusting your mind to the silence, scale, and patience of the Himalayas.
Day 5: Trek from Har Ki Dun to Ratha Tho
Trek: 6–7km (Approx: 5–6 hrs) | Altitude: 17880-17980 ft
The morning in Har Ki Dun Valley feels different today, quieter, more remote, as if you’re about to leave behind the last traces of familiarity. As a trekker, you step out into the cold air, watching the first rays of sunlight touch the snow-covered peaks. There’s a sense of anticipation today, and you go deeper into the wild.
After breakfast, you begin your trek toward Ratha Tho. The trail gradually leaves the lush greenery of Har Ki Dun behind. The trees start thinning, and the landscape slowly shifts into something more rugged, rawer. The comforting sounds of the valley fade, replaced by the whisper of high-altitude winds.
The path climbs steadily now. Each step feels heavier, the air thinner, and your breath more deliberate. You learn to slow down, not out of exhaustion, but out of respect for the mountains. The terrain becomes rockier, with patches of snow appearing along the way, reminding you that you’re gaining serious altitude.
As you move further, the sense of isolation grows. There are no villages here, no signs of human life, just you, your team, and the vast Himalayan wilderness. Glacial streams cut through the terrain, and crossing them feels like stepping into a world untouched by time.
Hours pass in this rhythm of effort and silence until you finally catch sight of Ratha Tho, a remote campsite set amidst towering peaks and wide, open terrain. It doesn’t feel like a destination; it feels like a threshold to something even greater.
You reach camp tired but fulfilled. Dropping your backpack, you look around. The mountains seem closer now, more powerful, almost overwhelming. The sky feels bigger, the silence deeper.
As night falls, the temperature drops quickly. Wrapped in layers, you sit outside your tent for a while, staring at a sky filled with countless stars. There’s no noise, no distraction, just a profound stillness.
In that moment, you realise this trek is no longer just a journey through landscapes, it’s a journey inward, where every step strips away the unnecessary, leaving only the raw experience of being in the mountains.
Day 6: Trek from Ratha Tho to Upper Lamjunga
Trek: 6–7 km (Approx: 5–6 hrs) | Altitude: 22,910 ft
The morning at Ratha Tho arrives with a sharp chill, the kind that instantly reminds you how high you’ve come. As a trekker, you unzip your tent and step out into a world that feels stark and powerful, no dense forests now, just vast open terrain and towering peaks watching in silence.
After a quick, warm breakfast, you begin your trek toward Borasu Base Camp. The trail is quieter today, almost meditative.
Each step takes you further into a landscape that feels untouched and raw. The greenery has nearly disappeared, replaced by rocky paths, moraine stretches, and occasional patches of lingering snow.
The climb is gradual but demanding. At this altitude, even a small incline makes your lungs work harder. You slow your pace, naturally step, breathe, pause, finding a rhythm that keeps you going without draining your energy. The wind feels colder here, sharper against your face, carrying a sense of the high mountains ahead.
As you move forward, the terrain grows more dramatic. Glacial streams snake through the valley, and crossing them requires focus and balance. The silence around you is deep, broken only by the crunch of your boots and the distant sound of melting ice.
Hours into the trek, you begin to see the vast expanse leading up to Borasu Pass. It stands far ahead, still distant but unmistakable. For the first time, the reality of crossing it truly sinks in.
By afternoon, you reach Borasu Base Camp. It’s not just another campsite it feels like the edge of an expedition. Surrounded by rugged ridges and high-altitude wilderness, the camp sits in a place where nature feels both beautiful and unforgiving.
You drop your backpack, feeling the weight of the day lift, but also sensing what lies ahead. Tomorrow is the biggest challenge of the past itself.
As evening falls, the temperature drops quickly. The team gathers early for dinner, discussing plans for the summit push. There’s a mix of excitement and quiet focus in the air.
Before heading into your tent, you take one last look at the mountains. Under the fading light, Borasu Pass looks even more imposing, silent, distant, and waiting.
Day 7: Trek from Patar Nachuni to Lohajung
Drive: 110-120 km (Approx: 8-10 hrs) | Altitude: 15,750 ft
The final day begins with tired legs but a full heart. Leaving Patar Nachauni behind, you start a steep descent into the mysterious Ghaeroli Patal. The trail drops quickly, winding through a dense forest that feels ancient and alive.
Towering cypress trees rise all around you, their trunks silent, as if they’ve been standing guard for centuries. Sunlight barely filters through, creating shifting patterns on the forest floor. The air is cooler here, filled with the sounds of birds, bright flashes of colour darting between branches, adding life to the deep green stillness.
As you descend further, the forest slowly opens, and you arrive at Wan Village, one of the largest and most vibrant settlements in this region. There’s a sense of life returning to children, homes, and the rhythm of daily mountain living.
A visit to the sacred Latu Devta Temple adds a final touch of mystery to the journey. The traditions here are unique the priest is said to enter the temple blindfolded, preserving rituals that have been followed for generations. It’s a quiet, powerful reminder of how deeply rooted these mountains are in culture and belief.
Soon after, you hop into a vehicle for a short but bumpy ride back to Lohajung. The road feels rough, but compared to the trails you’ve conquered, it’s almost comforting.
By the time you arrive, the trek has come full circle. And then comes a simple luxury that feels extraordinary a hot shower after six days in the wild. Standing under warm water, you realise just how far you’ve come, not just in distance, but in experience.
The Roopkund journey ends here, but a part of it stays with you, long after you leave the mountains behind.
Day 8: Trek from Bonga to Chitkul Road Head, overnight stay at the hotel
Trek: 12–15 km (Approx: 5–6 hrs) | Altitude: 11,320 ft
The morning at Bonga Camp begins with a quiet chill in the air and a soft light spreading over the surrounding ridges. After days spent in the raw high Himalayas, there’s a different feeling today, not the tension of climbing higher, but the calm awareness that the journey is slowly coming to an end.
As a trekker, you step out of your tent for the last time at this altitude, taking a deep breath of cold mountain air. The memories of crossing Borasu Pass still feel fresh, but today the path is simpler: descent toward Chitkul road head.
After breakfast, you shoulder your backpack and begin walking downhill. The trail feels gentler now, almost forgiving. What was once harsh, rocky, and snow-filled terrain gradually softens into rolling slopes and scattered greenery. Every step forward feels lighter, not just physically but mentally too.
The silence of the higher camps slowly fades as the valley opens up. You start hearing distant bird calls again, the rustle of wind through bushes, and the familiar sound of the Baspa River growing stronger below. Life is slowly returning to the landscape.
As you continue descending into Kinnaur, the scenery transforms completely. Trees become denser, patches of grass turn greener, and wooden houses begin to appear along the slopes. Civilisation feels close but still beautifully distant.
The trail eventually merges with a motorable stretch near the Chitkul road head. The sight of vehicles, small tea stalls, and paved roads feels almost unreal after days in the wilderness.
Standing there for a moment, you don’t rush to leave. You just look back toward the mountains you crossed, trying to process how far you’ve come, not just in distance, but in experience.
A short drive takes you to a warm hotel nearby. The moment you enter your room, everything feels different warm water, soft beds, and the simple comfort of four walls. Boots come off, backpacks are finally unstrapped, and silence feels peaceful instead of powerful.
That evening, as you sit by the window of your hotel, the Himalayas are still visible in the distance, calm, silent, unchanged. But you know something inside you has shifted. The trek is over, but the journey stays with you.
Day 9: Drive from Chitkul to Shimla (Departure)
Drive: 250 km (Approx: 8–9 hrs) | Altitude: 7,200 ft
The morning in Chitkul feels unusually calm. After days of trekking through the raw wilderness of the Himalayas, everything here feels almost surreal wooden houses, the sound of the Baspa River, and the crisp mountain air that now carries a sense of closure rather than challenge.
As a trekker, you wake up with a mix of emotions. The body is tired, but not from effort anymore rather from memories. After breakfast, you load your bags into the vehicle waiting at the road head. One last look at the valley, one last glance at the towering ridges of Kinnaur, and the journey begins.
The drive from Chitkul to Shimla starts along the beautiful Baspa Valley. Slowly, the narrow mountain road winds down through forests, river bends, and small villages that seem untouched by time. The scenery keeps changing, snowy peaks fade into green slopes, then into thick pine forests that line the roads.
As the vehicle moves forward, conversations inside are softer than before. Everyone is replaying their own version of the trek, the steep climbs, the silence of high camps, the moment of crossing Borasu Pass, and the feeling of standing somewhere far beyond comfort zones.
The road passes through Sangla, then onto Rampur, where the mountains begin to loosen their grip. Rivers still follow you, but the terrain feels less wild, more familiar. Tea breaks along the way feel different now, not for survival or warmth, but for reflection.
As hours pass, the high Himalayas slowly disappear behind layers of hills. The air becomes warmer, busier, and more connected to the world you had left behind. By the time you reach Shimla, the contrast feels complete. Traffic, lights, crowds, and movement replace the silence of glaciers and ridges.
Difficulty Level of Borasu Pass Trek
Borasu Pass Trek is classified as a Level (Difficult) high-altitude traverse. It is not a standard hike; it is a technical crossover that demands significant physical stamina, mental grit, and prior experience with altitudes above 5450 meters.
1. Technical Terrain and "The Vertical Wall"
The most daunting aspect of Borasu Pass is the summit day. Unlike moderate passes where you simply walk to the top, Borasu features a near-vertical final ascent.
The 70-Degree Incline: The final stretch to the pass is an intimidating 70-to-75-degree slope. Depending on the season, this is either hard-packed ice or loose, slippery scree.
Glacial Hazards: You must navigate the Zupica Glacier, which is riddled with both open and hidden crevasses. Walking on a glacier requires "roping up" in teams to ensure that if one person slips or falls into a crevasse, the team can arrest the fall.
Rappelling/Fixed Ropes: The descent toward the Himachal (Chitkul) side begins with a massive 50-meter drop. This section is often too steep to walk down safely and frequently requires the use of fixed ropes or technical descending maneuvers.
2. Physical Toll and Endurance
The trek covers approximately 67 km over 8 days, but the numbers don't tell the full story.
Knee-Breaking Descent: After reaching the summit at 5,450 meters (17,880 ft), you must descend nearly 2,000 meters to reach the Bonga campsite. This sustained downward pressure is brutal on the knees and requires high lower-body strength.
The "Boulder Zone": Vast stretches of the trail consist of moraines—fields of unstable, jagged boulders. Negotiating these requires constant balance and "boulder-hopping," which is mentally exhausting and carries a high risk of ankle injuries.
3. High-Altitude and Atmospheric Challenges
At nearly 18,000 feet, the environment is fundamentally hostile to the human body.
Oxygen Levels: At the summit, you are breathing roughly 50% of the oxygen available at sea level. This makes every step feel like a heavy lift and increases the risk of Acute Mountain Sickness (AMS).
Thermal Stress: Temperatures at the higher camps (Upper Lamjunga) regularly drop to -10°C or lower at night. Sustaining your energy in such cold while sleeping in tents adds a layer of "attrition" to the trek.
4. Remote Isolation
Borasu Pass is far less commercialized than the nearby Rupin or Bali passes.
No Exit Strategy: Once you pass Har Ki Dun, there are virtually no "easy" ways out. If an injury or severe altitude sickness occurs, evacuation is extremely difficult due to the rugged terrain and lack of infrastructure. You are essentially in a "commitment zone" where the only way forward is over the pass.
Summary Verdict
The Borasu Pass is a bridge between trekking and mountaineering. It is recommended only for those who have completed at least 3–4 high-altitude treks and are comfortable using technical gear like micro-spikes, ice axes, and gaiters.
Best Time to Visit Borasu Pass Trek
The ideal time to trek to Borasu Pass is May to June and September to early October, when weather conditions are relatively stable, snow levels are manageable, and high-altitude routes are accessible. This trek connects the remote regions of Uttarkashi via the Har Ki Dun valley to Kinnaur, making it a challenging high-altitude expedition.
May to June (Pre-Monsoon / Summer Season)
- Snow Adventure: Early-season treks involve crossing snowfields near Borasu Pass (approx. 5,450 m), making it ideal for experienced trekkers seeking alpine conditions.
- Stable Weather Windows: Days are generally clear with moderate temperatures, though nights remain cold at higher camps.
- Accessible Trails: Routes through Har Ki Dun Valley begin to open as snow melts, allowing gradual access to higher altitudes.
- Scenic Beauty: Blooming alpine flowers, melting glaciers, and lush green valley’s contrast with snow-covered peaks.
- Technical Challenge: Snow and ice sections near the pass may require proper gear and mountaineering skills.
July–August (Monsoon Season)
- Heavy Rainfall Risks: The lower regions (especially the Uttarkashi side) receive significant rainfall, making trails muddy and slippery.
- Landslides & Route Damage: Roads and trekking paths are prone to landslides and washouts, especially the route to the Sankri base village.
- River Crossings Difficult: Streams swell due to rain and glacier melt, increasing risk during crossings.
- Poor Visibility: Cloud cover often obstructs mountain views, reducing the overall trekking experience.
- Not Recommended: Due to safety risks and unpredictable conditions, this season is generally avoided.
September to October (Post-Monsoon Season)
- Best Visibility: Crystal-clear skies offer stunning views of Himalayan peaks and the Borasu Pass region.
- Stable Terrain: Trails become firmer after the monsoon, making trekking safer and more comfortable.
- Pleasant Weather: Cool daytime temperatures and crisp nights create ideal trekking conditions.
- Autumn Landscapes: Golden-brown hues replace greenery, adding a different charm to valleys like Har Ki Dun.
- Ideal Trekking Window: Preferred by trekkers seeking a balance of safety, scenery, and manageable conditions.
November to April (Winter Season)
- Heavy Snowfall: The pass and upper valleys receive deep snow, completely blocking access routes.
- Extreme Cold: Temperatures drop well below freezing, especially at higher altitudes.
- Trail Inaccessibility: Har Ki Dun and higher camps become difficult to reach due to snow accumulation.
- Limited Support: Most trekking operations shut down, and villages in upper regions may be partially abandoned.
- Expedition-Only Conditions: Only highly specialised winter expeditions with technical expertise can attempt parts of the route.
Why choose Borasu pass Trek?
Before heading towards the itinerary, it is really essential to perceive the reason behind choosing Bali Pass Trek. See firstly, the trekking distance is a total of by taxi ;221 Km and on foot 64 km which is to be covered in 8 days. Dehradun to via Har Ki Dun To Chitkul market Borasu Pass trek is a high altitude mountain trek Altitudes is 5450 Meters The Starting trail is moderate as compared to other treks this is a difficult trek. So this trek is not for beginners
Need proper gear & clothing for sub-zero temperatures?
In addition, You got to see so many heavenly bodies at one place like the panoramic view of the Himalayan ranges, meadows, one of the beautiful Har Ki Dun Trek on the way to beautiful manida lake, pine forests, different variety of flora and fauna surpassing through bona fide Garhwali heritage and culture.
I think Do spare time in Interaction with our local’s team, and you will get to know about some of the ancient tales of Indian mythology and our local cultures, these is good ideas for trekkers And, in summer, the Borasu pass trek turns totally different and amusing because of meadows, wildflowers, and woods blooming in different colures. Beautiful landscapes so carry proper photo gear & Extra battery backup. The backpack should not exceed 10 to 12 kg only
Borasu Pass Trek in May or June?
Borasu Pass Trek Month in May and June gives a slightly different experience to Trekkers because in May you start getting snow after Har Ki Dun. The Borasu Pass trek starts from Sankri market and its endpoint is Chitkul Village. Borasu pass trek starts from Sankri via Har Ki Dun in Uttarakhand which comes in the Supin range and end this trek ends at Chitkul village which comes in Himachal Pradesh
In May and June, you get a combination of both greenery and snow, which makes the trek very spectacular. The weather in May and June is quite good and trek-friendly, which makes trekking a lot of fun. During the day the temperature of Borasu Pass is around ( 5°C to 10 °C and during the night the temperature comes down to -1 °C to -5 °C which is not bad. Views and treks in Borasu Pass provide a lot of peace to the mind during the day, while you wake up from one wake to another, Borasu Pass can always be one of the closest treks in your heart.
You will never consider yourself bored in Borasu Pass Trek, this trek can give you nothing but joy, You will get to see the culture and beauty of two beautiful states in this trek which will always keep you connected to the mountain.
Borasu Pass Trek in September or October?
Borasu Pass is a little different in the months of September and October, this is because you will not find snow here in these months.
But the beauty of the trek will not be lacking, the trek and nature adorn themselves with time and in different colors. The month of September and October are very good days to trek, at this time total greenery and at the end of October sometimes you can get to see live snowfall.
During the day the temperature of Borasu Pass is around Day time 6°C to 13 °C and during the night the temperature comes down to 3 °C to – 4 °C which is very confirmable,
At this time the weather here will be very good for you, At this time it is even safe to trek here and there is no rain.
How to Reach Dehradun for Borasu Pass Trek
Trekking with Himalayan Hikers, your real journey starts at the Dehradun Railway Station early in the morning (usually 6:00 AM to 7:00 AM) for the drive to Sankri.
1. By Air: Jolly Grant Airport (DED)
The airport is actually closer to Rishikesh than Dehradun city.
The Strategy: Aim to land in Dehradun a day before your trek starts.
Transport to City:
* Private Taxi: ₹1,200 – ₹1,500 (approx. 1-hour drive).
* Electric Bus: Affordable airport shuttle buses run to the ISBT Dehradun.
Pro Tip: If you arrive late at night, stay near the Railway Station so you are ready for the Himalayan Hikers' pick up the next morning.
2. By Train: Dehradun Railway Station (DDN)
This is the most convenient option because most trekking groups meet right outside the station.
Top Recommendations:
Nanda Devi Express: Arrives from Delhi around 5:40 AM (Perfect timing).
Dehradun Shatabdi: Arrives around 12:50 PM (Requires a stay in Dehradun for the night).
Pro Tip: Book your return tickets from Dehradun for the day after the trek ends. Mountain roads are unpredictable; never book a return train for the same evening you return from the mountains.
3. By Road: ISBT Dehradun
Dehradun is a major hub for Volvo and Deluxe buses.
From Delhi: Buses leave from Kashmere Gate ISBT. The overnight "AC Volvo" is the most comfortable for the 6–7-hour journey.
Arrival Point: You will drop at the Dehradun ISBT. From there, take an auto-rickshaw (₹100–₹150) to the Railway Station area.
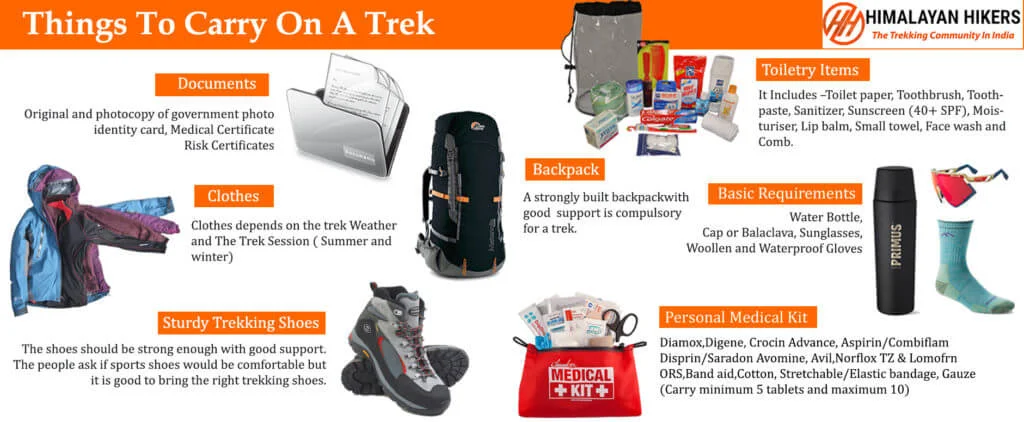
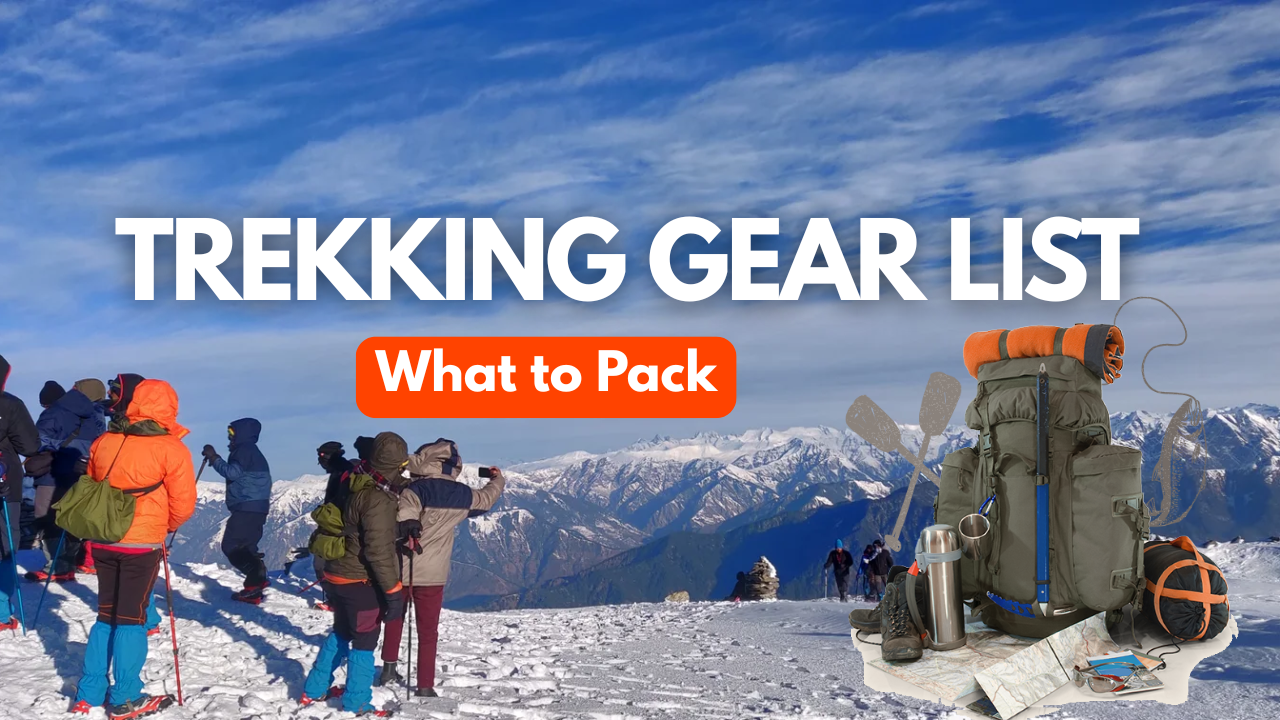
Essential Gear for the Borasu Pass Trek Packing List
1. Trekking Gear & Bags
- Main Backpack (50–60 Liters): Must have good hip support and a rain cover.
- Daypack (20 Liters): Essential if you plan to offload your main bag; carries water, snacks, and a jacket.
- Trekking Poles: Highly recommended for stability on snowy slopes.
2. Clothing (The Layering System)
- Base Layer (2-3 Pairs): Quick-dry, moisture-wicking thermals (top and bottom).
- Mid Layer (2): Fleece jackets or sweaters for insulation.
- Outer Layer (2): A high-quality padded down jacket (rated for -10°C).
- Trekking Pants (2): Water-resistant and windproof pants. Avoid jeans at all costs.
- T-shirts (3): Collared, full-sleeve dry-fit tees to prevent sunburst on the neck.
3. Footwear & Socks
- Trekking Boots: High-anchor, waterproof boots with good grip Decathlon Forclaz or similar MH 100) Asain, Jonmart hiking Shoes .
- Woolen Socks (4 Pairs): For sleeping and extra warmth at night.
- Cotton Socks (4 Pairs): For trekking during the day.
4. Headwear & Accessories
- Sun Cap: To protect against UV rays during the day.
- Woolen Cap/Balaclava: Must cover your ears to prevent heat loss.
- Neck Warmer/Buff: Protects your face from cold winds.
- Gloves: One pair of fleece liners and one pair of waterproof outer gloves.
- Sunglasses: Polarized/UV protected to prevent snow blindness.
5. Personal Hygiene & Toiletries
- Sunscreen (SPF 50+) and Lip Balm.
- Moisturizer and Sanitizer.
- Toilet paper and Biodegradable wet wipes.
- Toothbrush, Toothpaste, and a small quick-dry towel.
6. Health & First Aid
- Personal Medikit: Band-aids, crepe bandage, and antiseptic.
- Anti-Altitude Sickness: Diamox (consult your doctor first).
- Pain Relief: Volini spray or Moov.
- Water Purification: Tablets or a LifeStraw.
Quick Tips for a Successful Trek with Himalayan Hikers
- Hydration: Drink at least 3/4 liters of water daily to help with acclimatization.
- Batteries: Cold drains phone and camera batteries fast. Keep them inside your sleeping bag at night to keep them warm.
- Eco-Friendly: "Pack it in, pack it out." Don't leave any plastic on the trail.
Must-Have Medicines for Borasu pass Trek
1. Altitude & Breathing
- Diamox (Acetazolamide): The most common medicine for AMS (Acute Mountain Sickness). It helps your body acclimatize faster.
Note: Start a preventive dose only after consulting your doctor, as it is a diuretic.
- Camphor (Kapur): Carrying a small pouch of camphor to smell can help some people feel more comfortable while breathing in thin air.
2. Pain & Inflammation
- Combiflam / Ibuprofen: For muscle aches, joint pain, or body fever after a long day of climbing.
- Dolo 650 (Paracetamol): For mild fever or headaches (often a first sign of dehydration or AMS).
- Diclofenac Gel/Spray (Volini/Moov): Essential for calf muscle cramps or knee pain during the descent.
3. Digestive Health (Very Important)
- Digene / Pudin Hara: For acidity or bloating caused by heavy meals at high altitudes.
- Ondem (Ondansetron): For nausea or vomiting (common symptoms of altitude sickness).
- Eldoper / Nor-Metrogyl: For loose motions or stomach infections.
- ORS / Electral: To prevent dehydration. Mix one sachet in your water bottle every day.
4. Respiratory & Cold
- Ascoril/Alex Syrup (or Lozenges): For "Khonchi" (dry mountain cough) caused by cold, dry air.
- Cetirizine / Okacet: For allergic reactions or a runny nose.
- Avomine: If you get motion sickness during the bumpy 10-hour drive from Dehradun to Sankri.
5. First Aid Basics
- Band-aids & Cotton: For small nicks.
- Crepe Bandage: In case of a minor ankle sprain on the snowy trail.
- Betadine/Dettol: Antiseptic for any cuts.
- Anti-fungal Powder: To keep your feet dry and prevent fungal infections from wet socks.
Mandatory Document Checklist for Borasu pass Trek
To trek in the Govind Pashu Vihar National Park (where Har Ki Dun is located), the Uttarakhand Forest Department and Himalayan Hikers require a specific set of documents for permits and safety protocols. Here is the checklist of mandatory documents you need to carry:
1. Government Identity Proof (Original + 2 Photocopies)
You must carry a valid, government-issued photo ID. This is required for forest check-posts at Netwar and Sankri.
Accepted: Aadhar Card, Voter ID, Driver's License, or Passport.
Note: Keep two photocopies handy as one will be submitted at the Forest Office for your entry permit.
Trek Insurance mandatory
2. Medical Fitness Certificate
Himalayan Hikers prioritizes safety. You cannot start the trek without a certified medical report.
- Requirement: The certificate must be signed and stamped by a registered medical practitioner (MBBS Doctor).
- Validity: It should usually be issued within 15–30 days of the trek start date.
- Criteria: It should state that your blood pressure, heart rate, and lung health are normal for high-altitude trekking.
3. Disclaimer & Waiver Form
This is a standard indemnity bond provided by Himalayan Hikers.
What it is: A document stating that you understand the risks of high-altitude trekking and are participating voluntarily.
Process: You can usually download this from their website, sign it, and hand it over at the Sankri base camp.

6-Week "Glacier Mastery" Training Plan for the Borasu Pass Trek
Weeks 1-2: The Foundation (Aerobic Base)
You are preparing for a 67 km journey. You need "slow-burn" energy.
- Running: 4 days a week. Focus on distance over speed. Target 5 km at a steady pace.
- Incline: If using a treadmill, set it to 7% grade to simulate the climb to Har Ki Dun.
Strength:
- Deep Squats: 3 sets of 25. (Crucial for the push from Upper Lamjunga).
- Calf Raises: 3 sets of 30. (The glacier approach puts massive strain on your calves).
- Superman/Back Extensions: 3 sets of 15. (You will be carrying heavier technical gear).
Himalayan Hikers Logic: Borasu requires "Lungs of Steel." At 17,880 feet oxygen is scarce. Practice "Box Breathing" (4s inhale, 4s hold, 4s exhale) during your walks.
Weeks 3-4: The Technical Transition (Ankle & Core)
Borasu pass involves "boulder hopping" and "glacier walking." Balance is everything.
- Weighted Walking: 2 days a week, walk 8-10 km with a 7 kg backpack.
- Intervals: 1 day a week. Run fast for 2 mins, walk for 1 min. This mimics the "bursts" of energy needed to climb steep snow slopes.
Strength:
- Lunges (Forward & Lateral): 3 sets of 15. (Essential for navigating the jagged moraines/boulders).
- Step-downs: Find a box or stair. Slowly step down. This builds the "braking" muscles for the 2,000 m descent to Rani Kanda.
- Plank: Hold for 90 seconds. A strong core keeps you balanced on slippery ice.
Weeks 5-6: Peak Endurance (The "Pass Crossing" Phase)
This is where you simulate the "Summit Day"10 to 12 hours of movement).
- The 5K Benchmark: Aim to run 5 km in under 30 minutes.
- The "Final Test": One 15-18 km walk with a 10 kg backpack. Include as many stairs or hills as possible.
- Ankle Stability: Stand on one leg while brushing your teeth or watching TV. It sounds simple, but it prevents sprains on the Zupica Glacier.
The Zupica Glacier: You will be on ice for hours. Practice walking in your boots on uneven, rocky surfaces to avoid "hot spots" (blisters) caused by stiff soles.
The "Salami" Descent: The descent into Chitkul is incredibly steep. Never run. Use a zigzag (Salami) pattern to save your ACLs and meniscus.
Hydration is Life: At 5450 m your blood thickens. You must drink 3 to 4 L of water. If your urine isn't clear, you aren't safe to climb.
The "Lamjunga" Cold: Upper Lamjunga is one of the coldest campsites. Practice "Cold Starts" (start your morning workout in slightly less clothing) to toughen your body’s thermoregulation.
What to present at the Sankri Base Camp:
- Medical Certificate: A strict requirement for Borasu due to the extreme altitude.
- The 10kg Test: Show your trek lead you can comfortably carry your loaded pack for 5 km without heavy panting.
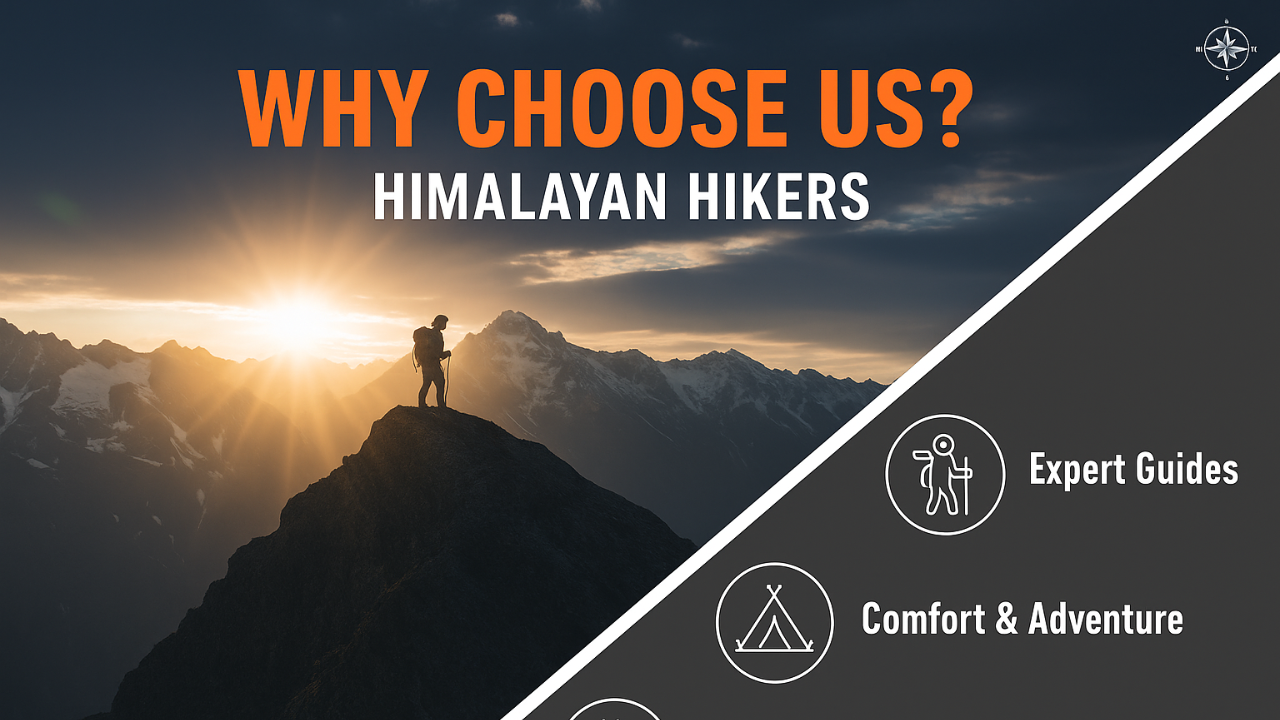
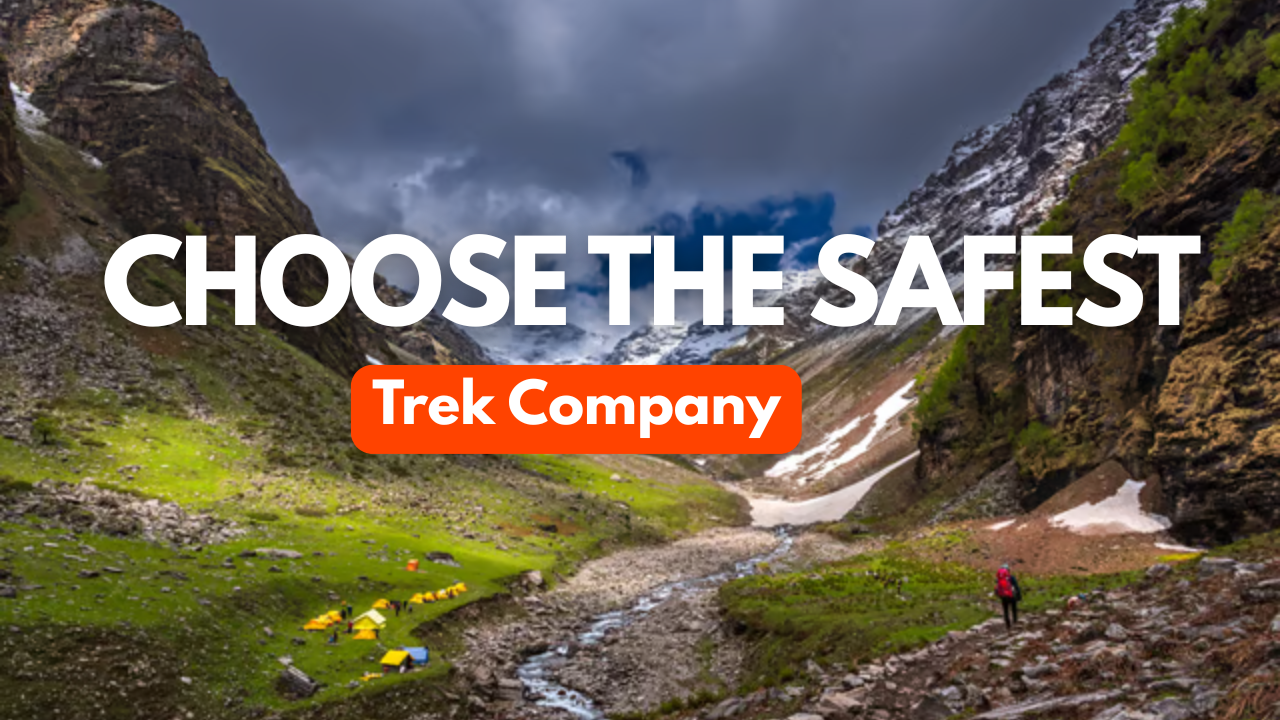
Why Himalayan Hikers is the gold standard for this specific high-altitude challenge
Borasu Pass Trek is a different ballgame compared to standard trek. Borasu Pass 5,450 m is a technical "Crossover" trek that connects the Tons Valley to the Yamuna Valley.
1. Technical Safety & Peak Protocol
Bali Pass isn't just a walk; it involves 60-degree descent on snow and scree. Safety here requires more than just a first-aid kit.
- NIM Certified Technical Leads: Our leaders are trained at the Nehru Institute of Mountaineering. (IMF Indian mountaineering foundation) with Local team For Bali Pass, they aren't just guides; they are technical experts who know how to fix ropes and cut steps in hard ice.
- The "Pass-Day" Strategy: The push from Ratta Dho, Upper lamjunga via the Pass is grueling. We start as early as 4:00 AM to ensure we cross the snow bridge before the sun softens the ice—a critical safety window.
- Advanced Medical Support: Given the 5,450 m altitude, we carry medical-grade Oxygen, Gamow bags (on request for large groups), and constant pulse-oximetry monitoring at every camp (Har Ki Dun to Upper lamjunga base
Himalayan Hikers Private all Safety equipment’s Helmet, Ice axe, Rope, Gaiters, Spikes more
2. The "Sankri to Chitkul " Logistics
Bali Pass is a one-way crossing. We handle the complex logistics of your transition from the Tons Valley to the Yamuna Valley seamlessly.
- Basecamp Comfort: Your journey begins at The Grand Shiva Home Stay in Sankri—our own property. You get a real bed, a hot meal, and a final technical briefing before heading into the wild.
- High-Altitude Shelters: We use specialized North Face-style 4-season Dome tents. At the Upper camp (the cave site), temperatures can drop to -10 degree our sleeping bags are rated for these extreme sub-zero conditions.
- Evacuation Readiness: We maintain a dedicated communication link with Chitkul for the exit phase, ensuring transport is waiting when you descend from the heights.
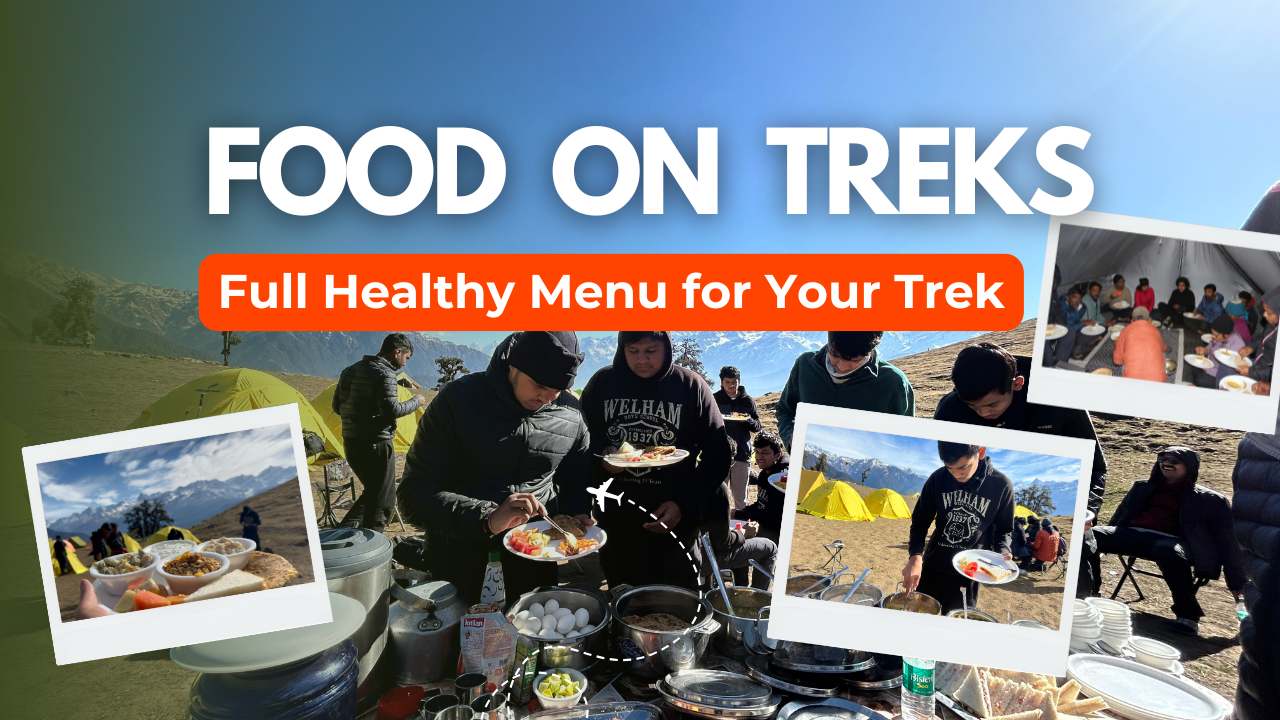
3. Nutrition for High-Altitude Survival
On Borasu Pass, you burn nearly 4,000–5,500 calories on the summit day.
- Thermogenic Diet: Our menu includes ginger soups, garlic-heavy dal fruits (to aid natural acclimatization), and high-energy snacks like nuts and chocolates for the final ascent.
- Hydration Command: We enforce the "5L Rule." Our kitchen staff provides warm water even at the highest camps to ensure you don't get dehydrated in the freezing wind.
Why We Are Different -Borasu Pass Trek
| Feature | Other Agencies | Himalayan Hikers |
|---|---|---|
| Route Knowledge | Follow standard trails. No good idea | Local Legends: Our guides grew up in these mountains; they know "hidden" escape routes if the weather turns. |
| Campsite Quality | Generic crowded sites. | Strategic Locations: We pick wind-shielded spots at upper lamjunga to ensure you actually sleep before the big climb. |
| Technical Gear | Often rented/basic. | Pro-Grade: We own our equipment, ensuring every carabiner and rope is safety-checked. |
| The Exit | You are left at the road-head. | Full Cycle: We manage your transition from the Chitkul side back to Shimla drop |
| Category | Details |
|---|---|
| Transport | Dehradun to Dehradun round-trip via Tempo Traveler (Pickup & Drop) |
| Permits & Entry | Forest Permit and Entrance Fees |
| Accommodation | Homestay, Tented Accommodation on Twin / Triple Sharing |
| Meals | Breakfast, Lunch, Tea, Coffee, Snacks, Soup, Dinner (All meals included) |
| Camping Gear | High-Quality Dome Tents, Sleeping Bags, Mattress, Liner |
| Sanitation Setup | Separate Toilet Tents (Ladies & Gents), Dining Tent, Dining Table, Camping Chair |
| Support Staff | Kitchen Team, Trek Helpers |
| Communication Tools | Radio Walkie-Talkie |
| Trek Guides | Experienced Trek Leader & Technical Guide |
| Safety Equipment | Medical Kit, Oxygen Cylinders, Pulse Oximeter |
| Trekking Equipment | Crampons, Gaiters, Helmate, Ice ax |
| Category | Details |
|---|---|
| Meals (Not Included) | – Day 1: En route Breakfast & Lunch to base camp– Day 8: En route Lunch & Dinner (not included) |
| Insurance & Documents | – Personal Insurance– Medical Certificate (Mandatory) |
| Personal Essentials | – Personal Toiletry Items– Personal Medical Kit |
| Porter Service | – Porter fee: ₹500 per day (to be paid directly at Sankri base camp)– Minimum bag weight for porter: 8 kg |
| Foreign Nationals | – ₹2800 extra for trekking permit– Passport and valid Visa required |
Important Note
Himalayan Hikers offers both online and offline booking options for their treks. Here’s a breakdown of both options:
1. Online Booking: Direct Visit our Official Website Himalayan Hikers has an official website where trekkers can browse through different treks, check details (itineraries, costs, difficulty level, etc.), and make bookings. Payment gateways are integrated for secure online transactions. Third-Party Platforms: They might also be listed on various trekking or adventure booking platforms, where you can compare prices, read reviews, and make bookings.
2. Email Communication: Trekkers can inquire about treks via email and complete the booking process online, following email communication and payment.
3. Offline Booking: Direct Visit our Official Website Himalayan Hikers has physical offices (especially in Uttarakhand), where trekkers can visit in person, discuss treks, and complete bookings directly.
4. Phone Booking: You can also call their office to make a booking. Details about payment methods, trek dates, and other logistics can be confirmed over the phone.
Yes, Himalayan Hikers requires a 25% advance payment for booking treks, Via- Google pay or UPI, Directly Himalayan Hikers Account with the remaining amount to be paid in cash at their branch office in Sankri before the trek starts. This payment structure is typical for ensuring that bookings are confirmed while allowing trekkers flexibility in completing the payment when they arrive.

It is rated as Difficult. While the initial days through Har Ki Dun are moderate, the pass crossing involves technical challenges: steep 70-degree snow slopes, navigating glacial moraines, and crossing crevasses. It is more of a semi-expedition than a simple hike.
No. Most experts and operators mandate prior high-altitude experience (at least 1-2 treks above 4,500 m). Beginners will likely struggle with the rapid altitude gain and the technical "ice-craft" required near the summit.
It is a very difficult trek suitable only for experienced trekkers.
There are two primary windows:
- Pre-Monsoon (May to June): Expect lots of snow on the pass and vibrant wildflowers in the valleys.
- Post-Monsoon (September to October): Crisper views, less snow, and stable weather, though nights become significantly colder.
The trek covers approximately 65–70 km over 7 to 8 days. You typically start in Sankri (Uttarakhand) and end in Chitkul (Himachal Pradesh).
You will reach an elevation of 5,450 meters (17,880 feet) at the summit of the pass. For perspective, that’s nearly the same height as Everest Base Camp.
Yes. Since the trail passes through the Govind Pashu Vihar National Park and crosses a state border near the Tibet frontier, you need:
- Forest Department permits (obtained at Sankri/Netwar).
- Aadhar card/Government ID (carry multiple copies).
You should be able to run 5 km in 30–35 minutes comfortably. Focus on cardiovascular endurance and leg strength, as you’ll be trekking for 7–9 hours on the pass day.
The trek starts from Sankri. The nearest major hub is Dehradun.
- By Air: Jolly Grant Airport (Dehradun).
- By Train: Dehradun Railway Station.
- By Road: A 10-hour scenic drive from Dehradun to Sankri.
High. You gain significant altitude after Har Ki Dun. Proper acclimatization at Ratha Tho or Upper Lamjung is non-negotiable. Always carry Diamox (consult your doctor) and stay hydrated.
Yes! One of the biggest highlights is the "stairway to heaven"—the Swargarohini massif. You also get views of Bandarpoonch, Black Peak (Kalanag), and the Jaundhar glacier.
Beyond standard gear, you must have:
- High-ankle trekking boots (with good grip for snow/boulders).
- Gaiters and Microspikes (essential for the pass crossing).
- Technical clothing: A 3-layer system to handle temperatures as low as -10°C.
It ends in Chitkul, famously known as the last Indian village on the Indo-Tibetan border. From there, you can drive to Shimla to head home.

.webp)